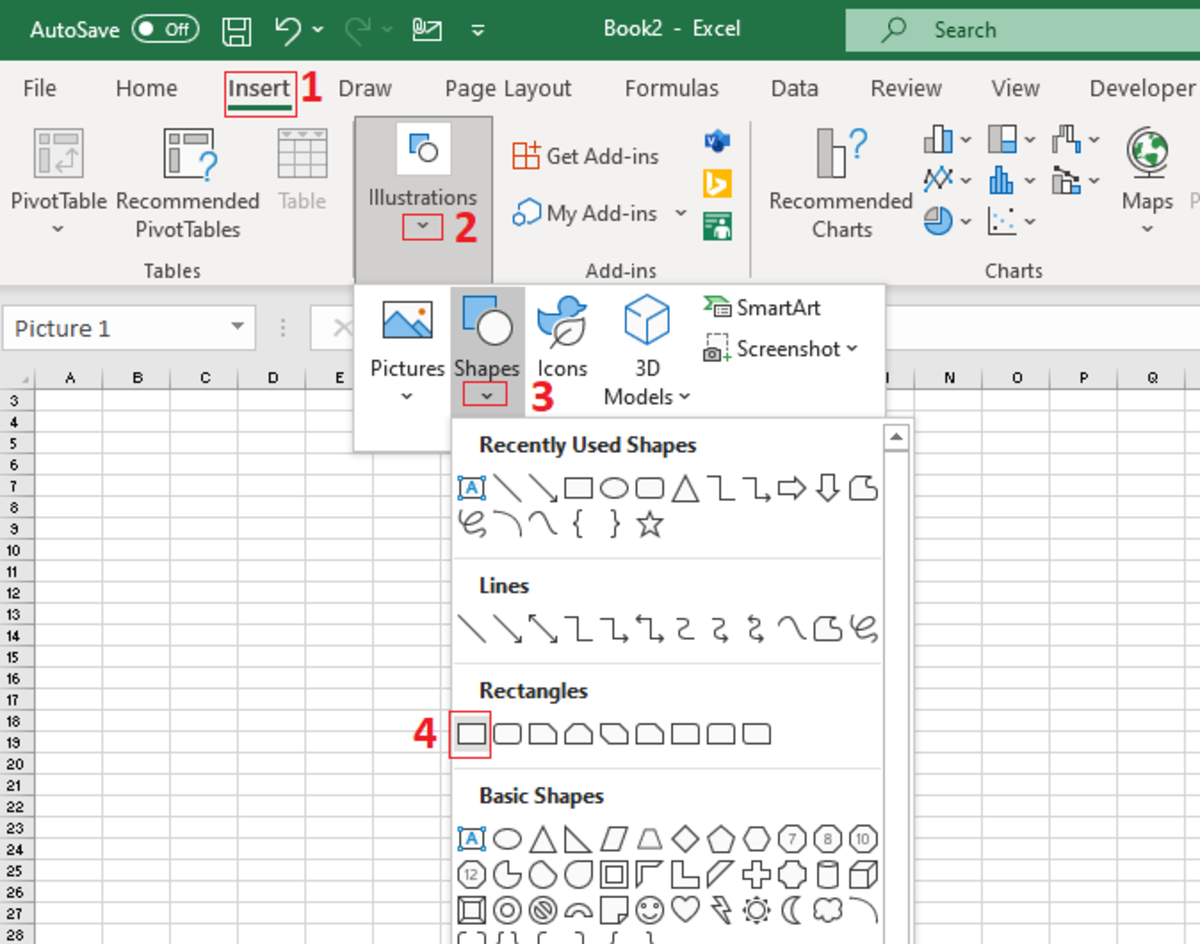
This task can be easily completed by adding a shape to use for a button, then assigning that button to a document location.
Step 1: Add the Button to Excel
Adding a shape for a button can be done through the insert tab. The path is shown below: Insert → Illustrations → Shapes I recommend using a rectangle to symbolize a button, but you can choose the shape that you desire. After the shape has been selected, you can trace the size of the button that you want with the cursor.
Step 2: Editing the Button
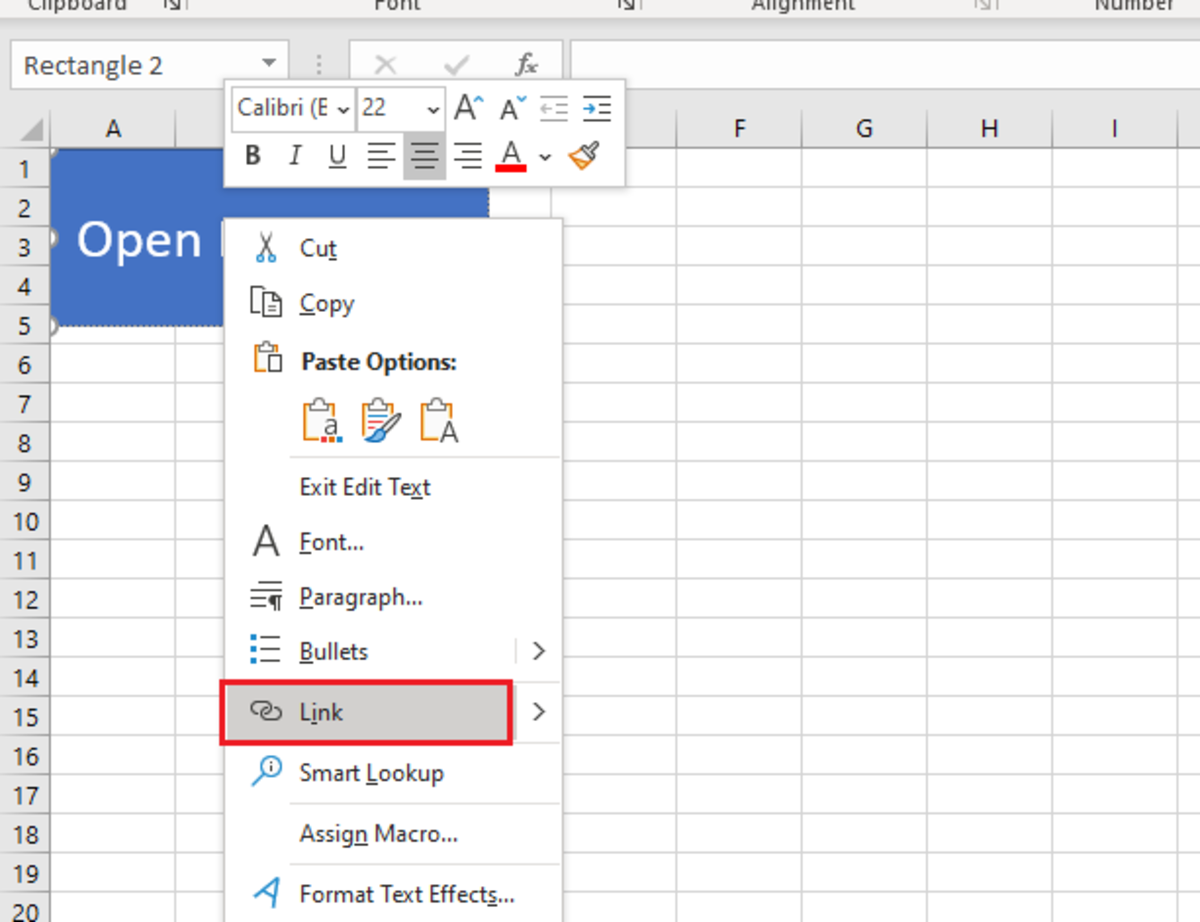
Make adjustments to the size of the button by dragging on the spheres that surround it to give it the correct height and width. To add the text, you can right-click on the button and select edit text from the drop-down menu. This will drop your cursor in to button. All other formatting options can be found in the shape format tab after the shape is selected.
Step 3: Linking to a File
To link a document to a file right click on the button and select link from the drop-down menu. Next, you’ll need to select the option in the upper left-hand corner that is labeled existing file or webpage. You may use the drop-down in the “look in” area or choose the folder option below that is labeled with a number 2. Once you find the file that you want to open select the OK button. At this point, you should have returned to the worksheet. Deselect the button by clicking in any cell. Click the button and there is a good chance that you will receive the same security precaution shown in the illustration below. Click yes and your document should open. This content is accurate and true to the best of the author’s knowledge and is not meant to substitute for formal and individualized advice from a qualified professional. © 2021 Joshua Crowder


