What Is a Prefab?
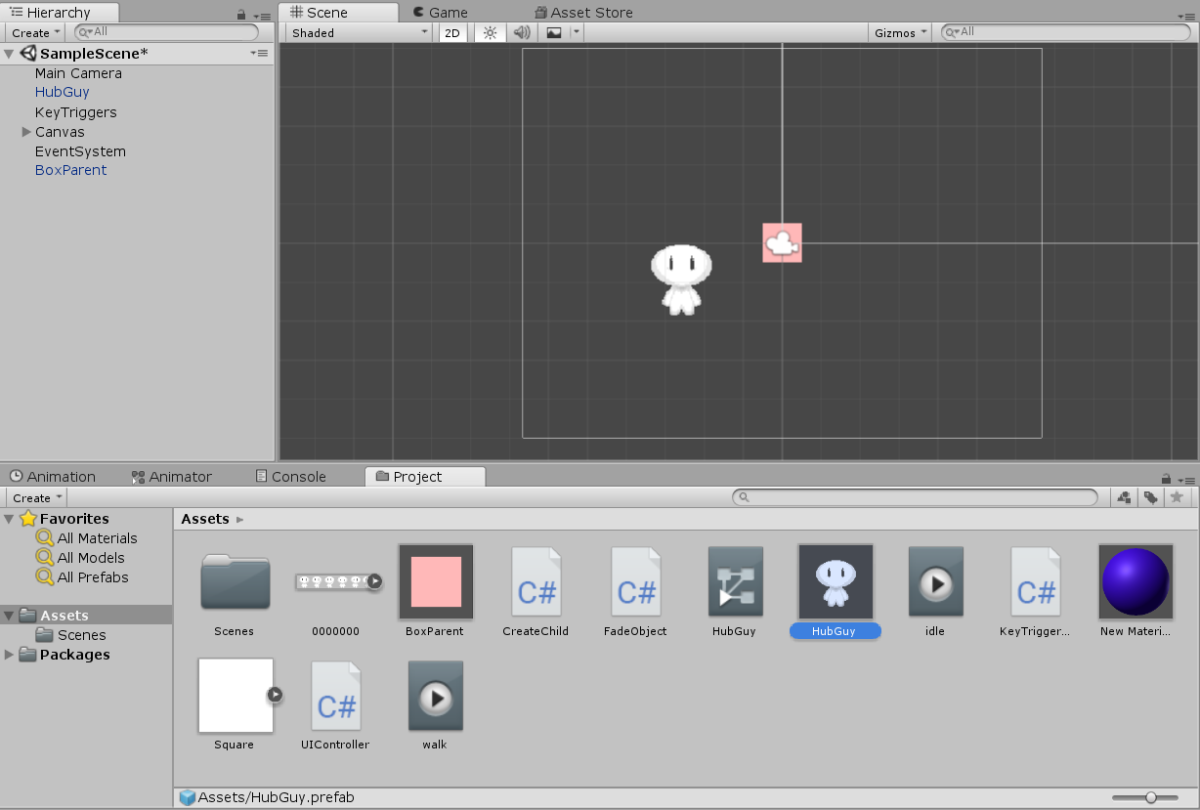
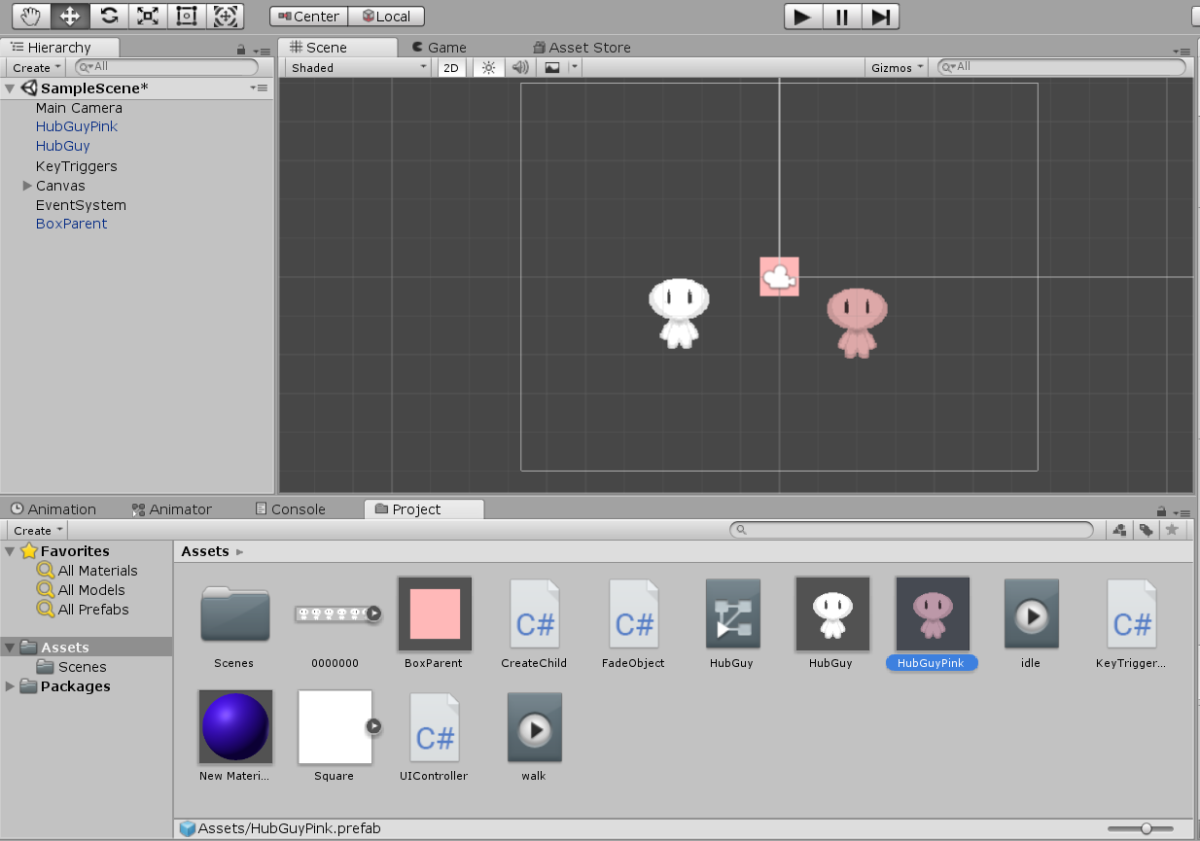
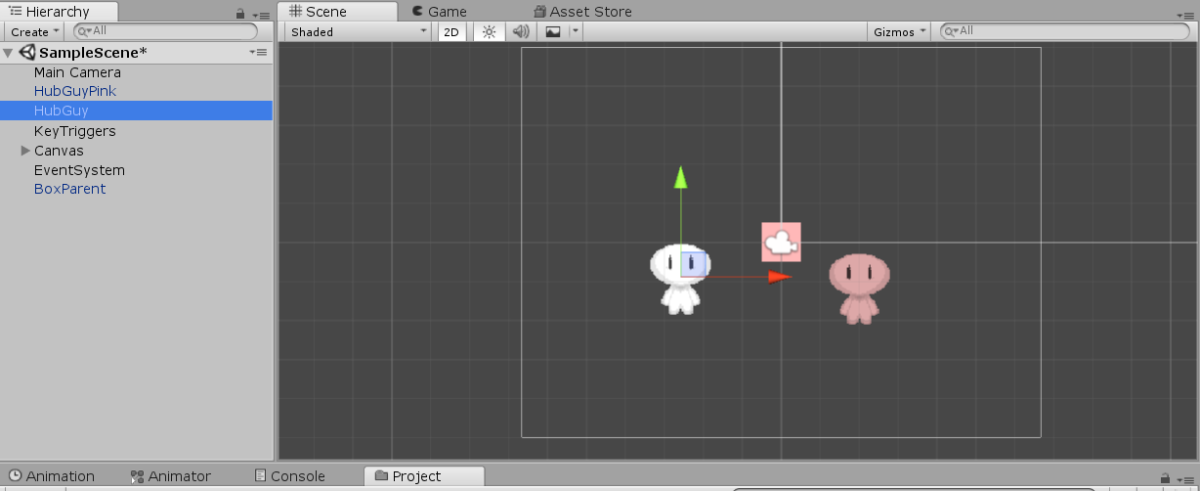
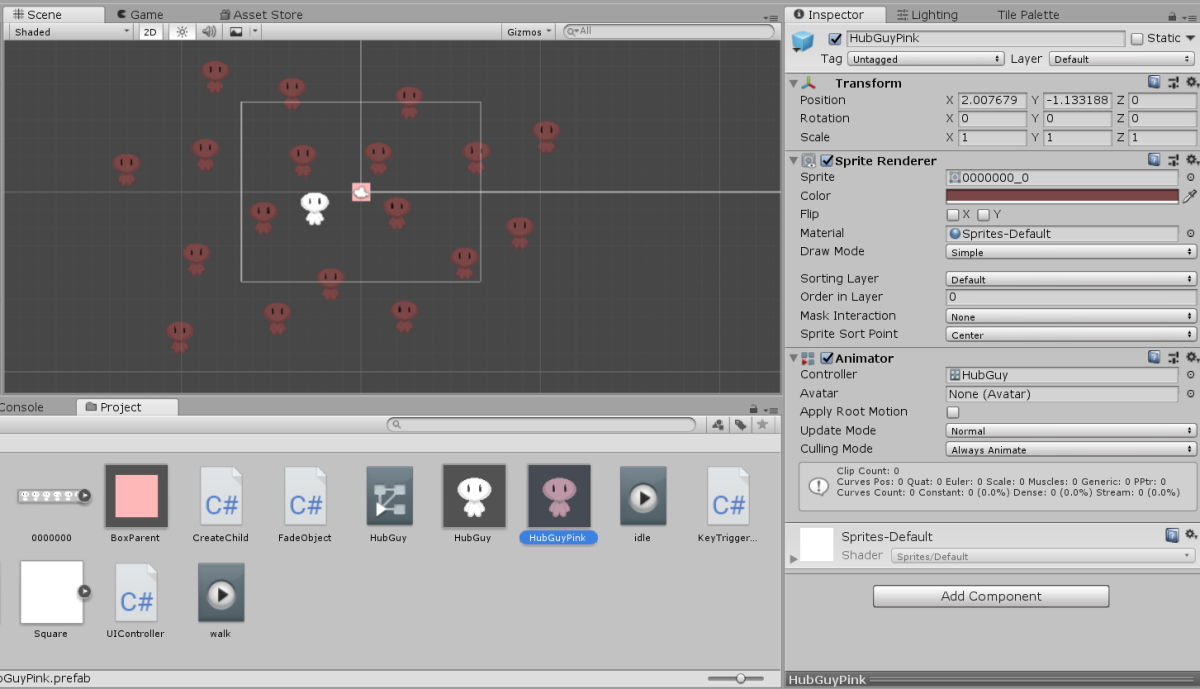
A Prefab in the context of Unity is a pre-packaged GameObject with a specific set of components, values, and child objects. Whenever an Instance of a Prefab is created in the game, it comes bundled with the same attributes every time and can then be manipulated and changed without changing the base Prefab. Prefabs are found in the Project Assets of the Inspector. Take the image above as an example. In the Project window, you can see a number of assets. The highlighted asset, HubGuy, is a Prefab. If you were to drag a thousand copies of HubGuy into the game, each of them would have Sprite Renderer and Animator components, and those components would all be identical to one another. But let’s say that you want a HubGuy who is slightly different than the original. You could make a different Prefab to reflect the change, like so: The second GameObject, HubGuyPink, has been altered slightly so that the sprite appears to be pink. This new GameObject was then saved as a separate Prefab, resulting in two distinct Prefabs in the Project window: HubGuy and HubGuyPink. You could thereafter make as many Prefabs of HubGuy as you need, each with a different combination of colors, components, values, and so forth.
How Do You Create a Prefab?
Creating a Prefab in Unity is the simplest part of the process. Once you’ve set up the GameObject that you want to be a Prefab, choose it in the Hierarchy on the left . . . . . . and drag it down to your folder of choice in the Project window. This will create the Prefab in your files. You can then drag and drop the Prefab onto the Hierarchy or directly into the Scene to create an Instance of the Prefab. (Note that if you drop the Prefab into the Hierarchy, it will move directly to the Prefab’s preset coordinates.) It is important to understand that the Prefab exists only in the Project files. Whenever you drag and drop the Prefab into the game, it becomes an Instance of the Prefab. You can change the values of the Instance at runtime, while it is generally not possible to change the values of a Prefab while the game is running. (Nor would it be a good idea.)
What Makes Prefabs Useful?
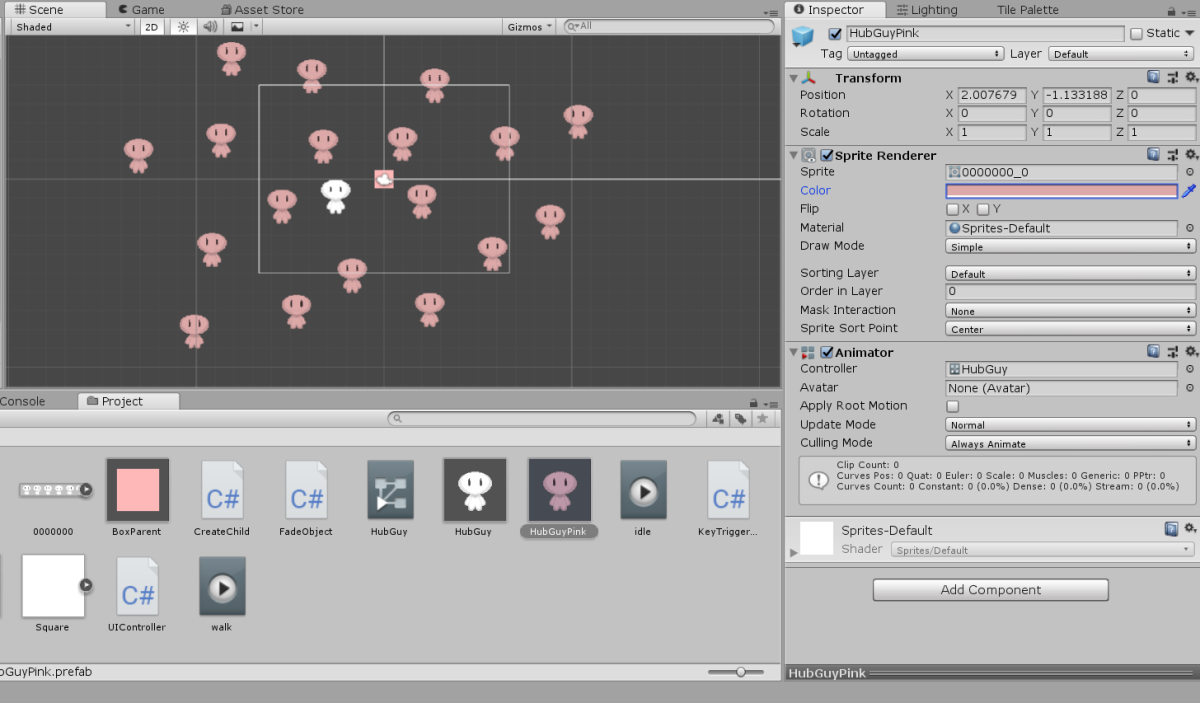
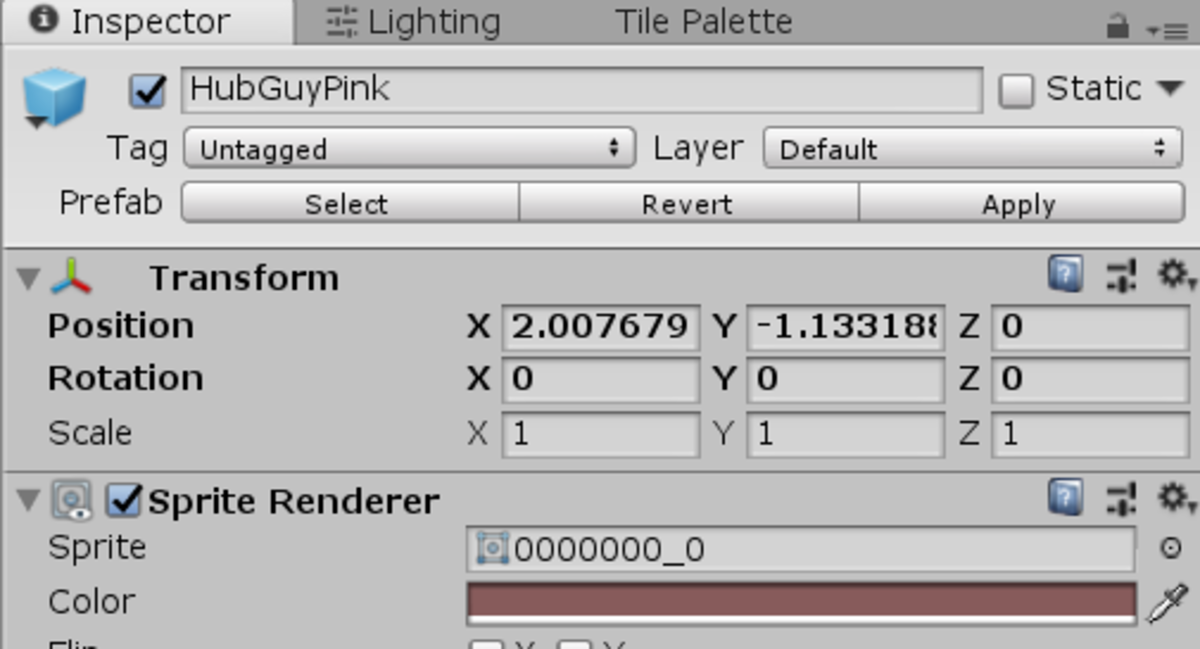
The ease of duplication aside, Prefabs are great because they allow for wide-scale changes without the need to mess with individual Instances of a GameObject. Let’s say, for example, that you had a big group of HubGuyPinks on the screen, but you wanted to change them to a different shade of pink. That’s a lot of sprites to change. Rather than messing with them individually, though, you can select the Prefab in the Project window, as above, and change the values in the Inspector. In doing so, your Prefabs go from a light shade of pink . . . . . . to something much darker. The change in the Instances is immediate and can be more drastic than something superficial. You could, for example, add a new component to the Prefab - perhaps a custom script you’ve created - and every Prefab would then immediately have that component. The alteration of Prefabs can work both ways, as well. Let’s say that you’re working on a specific GameObject and decide that you want to apply the change you’ve made to every other Prefab. If you look at the top of the GameObject’s values in the Inspector, you’ll see a little bar that’s absent when you look at the Prefab. There are three options: Select, Revert, and Apply. Select directs you to the GameObject’s Prefab in the Project window, which is simple enough. Revert and Apply, however, are much more powerful, and in this case, you want to Apply the change to the Prefab. If you were to click Apply, it would change the Prefab to reflect the GameObject’s current state and therefore pass on to every Instance of that Prefab. On the flip side, let’s say that the Instance you’ve been tinkering with is no longer to your liking. You could delete it, create a new Instance, and start over . . . or you could hit the Revert button and change it back to the Prefab’s values.
Preserving Values
Prefabs are also great because they allow you to preserve single-use, changeable GameObjects that are important to your game. This will come up more often than you might think. Let’s say, for example, that you’re making an RPG, and each character’s values are attached to their GameObject in component scripts. You’re likely to only have a single iteration of that character in your game, and you’ll wind up tinkering with the values a lot. Depending on their complexity, a player character might have a dozen or more scripts attached to them. What happens if you accidentally delete the GameObject? Well, hopefully, you can just Undo the mistake and carry on, but it’s easy to not notice and lose a ton of progress. By creating - and regularly updating - a Prefab of the character, you can easily preserve the GameObject in the Project, allowing you to swiftly pull out a new copy if the old one gets deleted. Think of Prefabs as a backup file of sorts. This doesn’t just apply to characters, either. Ideally, you should be making Prefabs of virtually everything in your game. The camera, the UI, the background, any invisible GameObjects that execute scripts in the background . . . you may never use the Prefabs, but keeping a neatly-cataloged, often-updated list of important GameObjects will save you some major headaches when things go wrong. (And they will. They always do.)
A Warning About Prefabs
Because changes to Prefabs can be so drastic, it is easy to make mistakes when applying those changes. Let’s say you’re working on an Instance of a Prefab but accidentally select the Prefab itself. Every value you type in will be passed on to the Instances, and you might not notice the changes until you get into runtime and your game turns into a malfunctioning monstrosity. On the flip side, it’s surprisingly easy to get into the flow of work and accidentally Apply changes to every Prefab when you only wanted those changes reflected in a single Instance. A simple, instant Undo will change the Prefab back, but if you’re thirty actions in before you notice the mistake fixing things might take a while. Game creation is tiring work, and you should always assume that you’ll regularly mess it up.
Another Warning About Prefabs
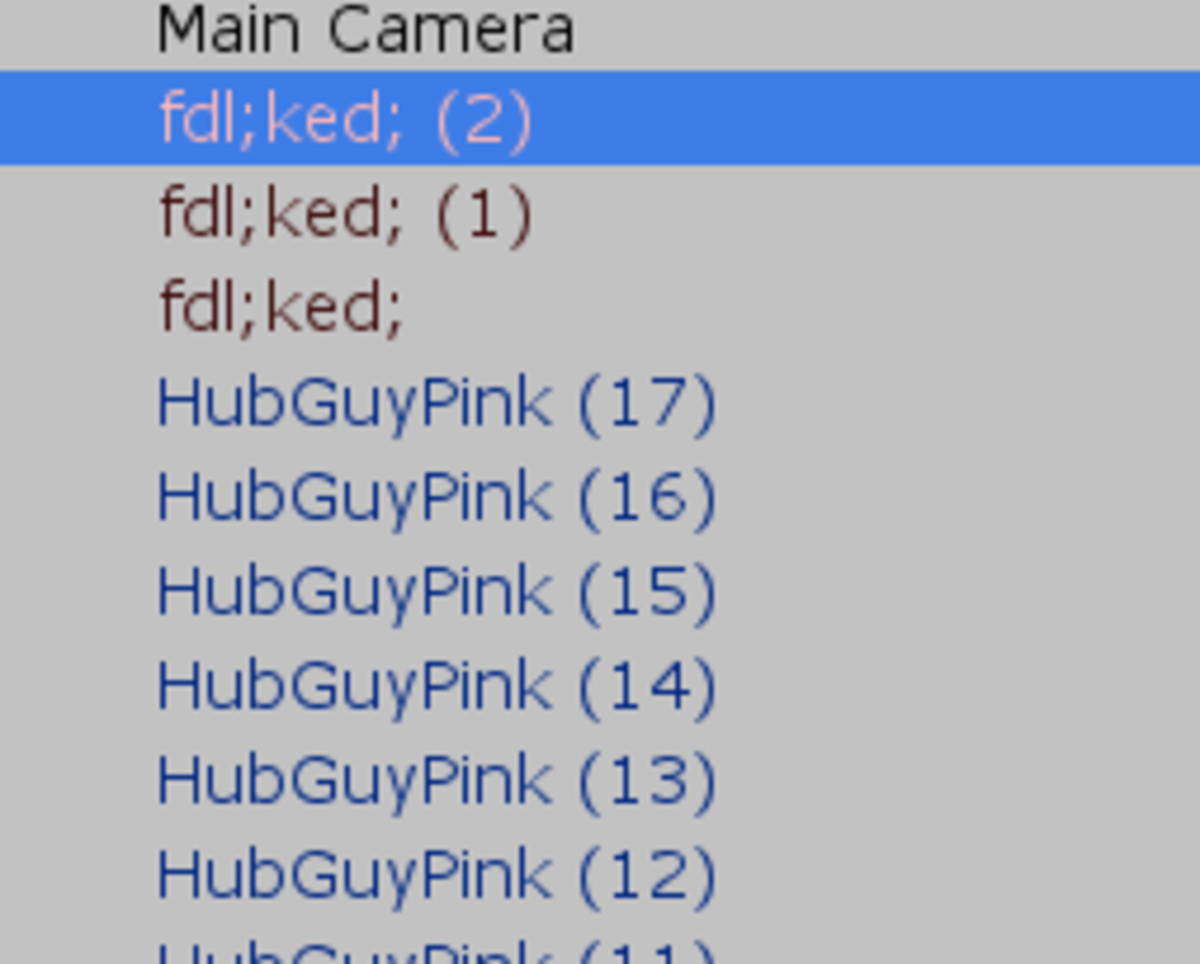
One last thing! As with all assets in Unity, it is possible for you to delete Prefabs. Not every Prefab will work out the way you want. Select the Prefab in the Project window and hit Delete. You’ll then get a warning that you cannot undo this action, and the Prefab will be gone permanently. Confirm this and the Prefab is gone. Sound fair? Well, again, it’s easy to screw up and accidentally delete things you meant to keep, especially when you’re in a hurry. It’s likely that every experienced Unity developer has deleted a Prefab they meant to keep at least once. Fortunately, there’s a way to undo this, assuming you have an Instance of the Prefab handy. Have a quick look at the Hierarchy. Instances derived from Prefabs appear here in blue, while GameObjects without Prefabs appear in black. Three of these GameObjects, however, appear pinky-red. These are GameObjects that were created as Prefabs but have now lost that connection. They are not instantly deleted but appear in sort of an orphaned state. If you click on one of the Instances the Prefab bar at the top will now just say ‘Missing’. All of the Prefab’s values will be retained in these GameObjects, fortunately, so in order to get the Prefab back, all you need to do is drag and drop one of the Instances into the Project window. This will essentially resurrect the Prefab. (Though the other Instances will remain orphaned, and you’ll have to delete them and create new Instances that connect back to the new Prefab. You can’t win ’em all.) This content is accurate and true to the best of the author’s knowledge and is not meant to substitute for formal and individualized advice from a qualified professional.